
How to Make Concrete Look Like Brick
Published . Updated .
How to make concrete look like brick depends on whether the slab is new, fully cured, or already coated. Existing concrete can take a painted, stained, scored, or overlay finish. Fresh concrete can be stamped or rolled while it is still workable.
Start with the slab, not the pattern. A decorative finish will not repair movement, loose concrete, trapped moisture, or an active crack.
Choose the Right Brick-Look Method
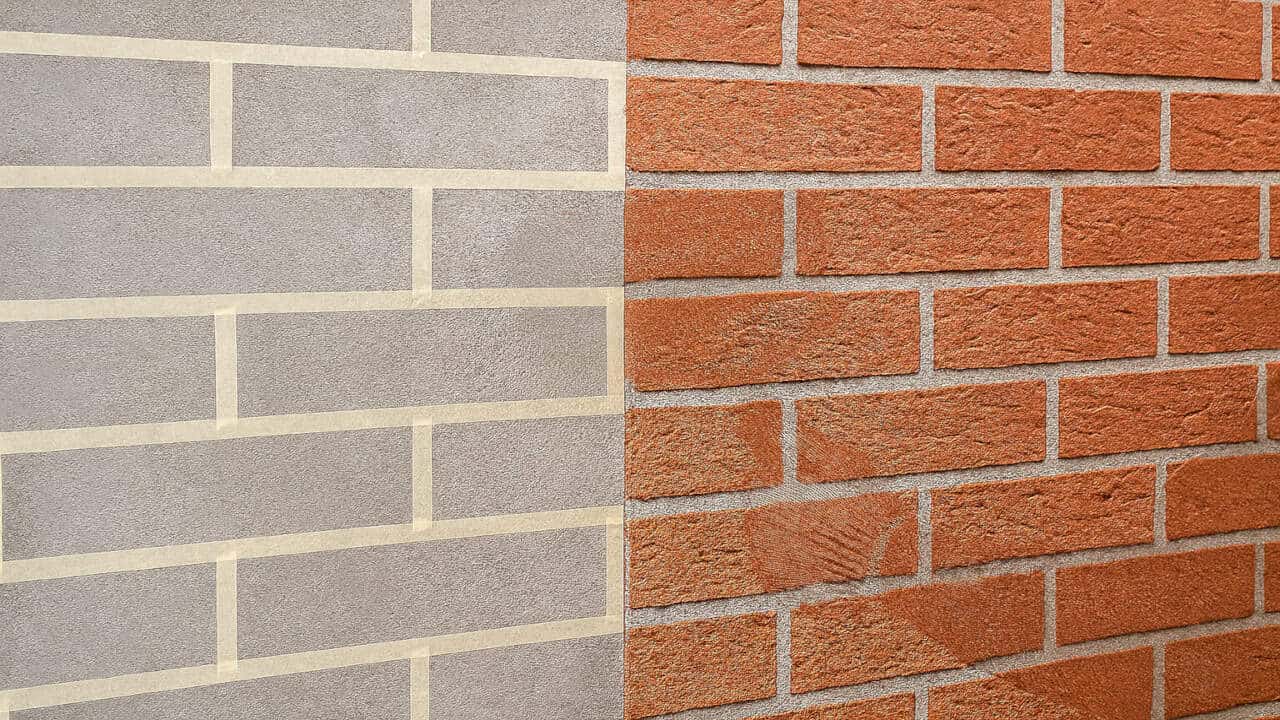
- Stencil with concrete coating: A practical choice for sound existing concrete when you want a clear mortar-line pattern.
- Sponge or hand-paint: Useful for small areas and custom color variation, but slower to keep aligned.
- Score and stain: Cuts shallow joints into cured concrete, then uses color to define the bricks.
- Decorative overlay: Adds a compatible cement-based layer that can be textured or stamped over a prepared slab.
- Stamp or roll fresh concrete: Creates texture during placement and needs a crew that can work within the concrete's setting time.
The American Cement Association lists stains, integral color, scoring, stamping, rolling, and slip-resistant coatings as compatible decorative approaches for concrete.
Inspect the Concrete Before Decorating It
- Check cracks: Mark cracks that are widening, uneven, or returning after repair. Movement must be addressed before a rigid finish is added.
- Check the surface: Remove loose paint, weak concrete, dust, oil, curing compound, and sealer that could block adhesion.
- Check moisture: Look for damp patches, efflorescence, drainage problems, or water entering from below.
- Check the planned use: A walkway, wall, patio, and driveway need different wear and slip resistance.
- Test a small area: Confirm color, bond, cleanup, and texture before committing to the whole surface.
Prepare Existing Concrete
Wash the surface with a cleaner suited to the contaminant, rinse it well, and allow it to dry. Repair stable defects with a product compatible with the planned finish.
Follow the coating or overlay manufacturer for surface profile. Some products need mechanical grinding or blasting rather than acid etching. Protect drains, soil, plants, walls, and nearby metal during preparation.
Method 1: Stencil a Brick Pattern
- Lay out the brick size and bond pattern on paper.
- Snap reference lines so rows stay straight across the area.
- Apply the approved primer or mortar-color base coat.
- Place the stencil without stretching it.
- Apply thin, even color coats with the recommended roller or sprayer.
- Lift the stencil at the time stated by the coating maker.
- Touch up gaps after the main coating has set.
Use more than one brick shade if you want natural variation. Keep the differences subtle and test them in the actual light.
Method 2: Paint Bricks With a Sponge
Cut a dense sponge to the brick size, mark straight guide lines, and practice on cardboard. Load the sponge lightly so paint does not squeeze into the mortar gap.
Work from a fixed edge and offset each row to match the selected bond. Rotate between a few related colors instead of mixing a new shade for every brick.
Method 3: Score and Stain Cured Concrete
Scoring creates shallow joints that remain visible after stain is applied. This method needs careful dust control and a blade suited to concrete.
- Confirm the slab is thick and sound enough for the planned cut depth.
- Mark the pattern and check every row before cutting.
- Use the cutting tool, guard, vacuum, and protective equipment named by the manufacturer.
- Clean all dust before applying stain.
- Test the stain because cured concrete can absorb color unevenly.
Method 4: Apply a Decorative Overlay
An overlay can create a fresh surface for stencils or texture, but it must be approved for the slab, location, thickness, and traffic. Follow the system instructions for primer, mixing water, working time, joints, curing, and sealer.
Do not bridge a moving joint with an overlay. Carry required joints through the decorative layer so the slab can move where it was designed to move.
Method 5: Stamp or Roll Fresh Concrete
Stamping and texture rolling happen during placement. Pattern timing changes with the mix, concrete temperature, wind, sun, and crew speed. Practice the layout and tool sequence before the pour.
Plan stamp placement so the crew can reach the whole area without stepping into finished work. Use the release product, touch-up tools, curing method, and wash timing specified for the system.
If you are building the slab in manageable pours, start with the guide to pouring a concrete driveway in sections.
Protect the Finished Pattern
Allow the paint, stain, overlay, or concrete to cure before sealing. Confirm that the sealer is compatible with every layer below it and suitable for the traffic and exposure.
Exterior decorative concrete can become slick when wet. Use the coating manufacturer's approved slip-resistant option where needed. Test the final appearance and grip in a small area.
Before sealing outdoors, use the driveway sealer weather window calculator to check rain, temperature, humidity, surface dryness, and curing time.
Avoid These Brick-Finish Mistakes
- Coating over dust, oil, curing compound, or loose paint.
- Hiding a moving crack instead of repairing the cause.
- Starting the pattern without reference lines.
- Using a wall coating on a floor or driveway.
- Applying one heavy color coat instead of thin, controlled coats.
- Sealing before the decorative layer has cured.
Ready for the Next Step?
Use the related guides and tools on Home Care DIY Hub to plan the job before you start.