
Why Is My Driveway Sealer Peeling? How to Fix It
Published . Updated .
Driveway sealer peeling usually points to a bonding problem between the coating and the surface below it. Moisture, dirt, oil, a weak older coating, incompatible products, heavy application, or poor drying conditions can all cause the film to lift.
Do not cover the failure with another coat. Find the cause first, remove everything that is loose, and confirm that the new product can bond to the remaining surface.
Find the Cause Before You Reseal
- Peeling in low spots or damp areas: Check for trapped moisture, drainage problems, or sealing before the surface was dry.
- Failure over oil stains: Clean and test the spot again. A coating will not bond well to contamination.
- Sheets lifting across a wide area: Check the old and new product chemistry and whether the first layer was sound.
- Soft or tacky coating: Heavy coats, cool conditions, humidity, or early traffic may have slowed the cure.
- Wear mainly in wheel paths: The surface may have opened to vehicles before the product reached its traffic-ready time.
The repair is the same in principle: remove failed material, clean the driveway, repair defects, let it dry, and apply a compatible product within its label limits.
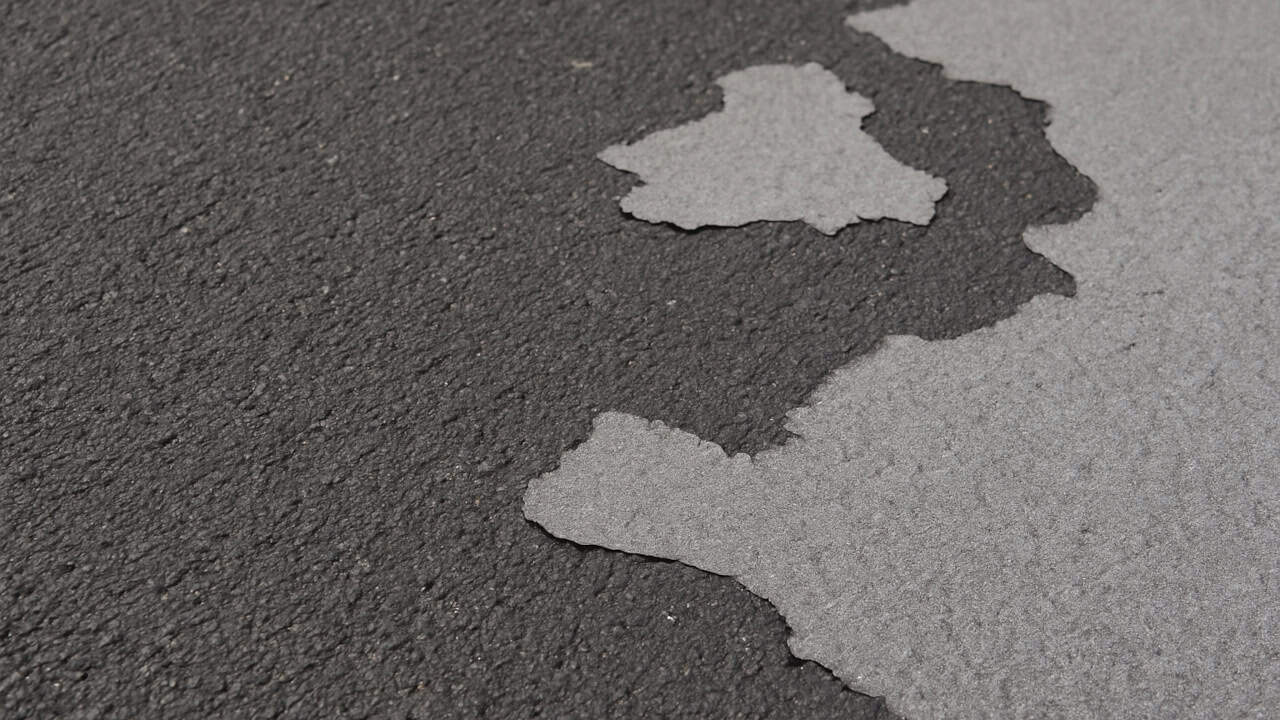
Loose edges and sheets show where the coating has lost its bond.
Check Where and How the Sealer Failed
- Map the damage: Mark low spots, wheel paths, shaded areas, oil stains, cracks, and places near sprinklers or downspouts.
- Lift a loose edge: A sheet that separates cleanly can point to contamination or an incompatible layer. Powdery material may be an older coating or weak surface.
- Check for moisture: Look for dark damp areas and water that remains after the rest of the driveway dries.
- Review the coating history: Find the old product label, receipt, or container if possible. Note whether each layer was water-based, solvent-based, penetrating, or film-forming.
- Review the application day: Check rain, dew, temperature, humidity, coat thickness, and when traffic returned.
Remove Loose or Incompatible Sealer
Scrape or brush away every loose edge. A pressure washer may help on a sound surface, but too much pressure can damage asphalt, mortar joints, or weak concrete.
Heavy buildup or a widespread incompatible coating may need grinding, blasting, or a remover made for that product. Test a small hidden area first. Follow the remover label, protect nearby plants, and collect residue as local rules require.
Clean Oil, Dirt, and Residue
Sweep and wash the entire work area. Use a cleaner made for the driveway material and the type of stain. Rinse away cleaner residue and let the surface dry fully.
The American Cement Association concrete guidance notes that stain-removal methods depend on the contaminant. A degreaser may help with oil, while deeply absorbed material can require mechanical cleaning.
Repair the Surface Before Coating
- Asphalt: Fill cracks and patch failed areas with products intended for asphalt. Let repairs cure as directed.
- Concrete: Remove weak material, use a compatible repair mortar, and allow the repair to cure. The guide to curing concrete in different climates explains how weather changes that step.
- Pavers: Reset loose units, replace missing joint material, and confirm the selected sealer is suitable for the paver and joint system.
Choose a Compatible Replacement
Do not assume every driveway sealer can go over every older coating. Ask the manufacturer whether the new product can bond to the remaining layer. When the old chemistry is unknown, a small test area is safer than coating the whole driveway.
Penetrating products and film-forming products behave differently. The ASCC and Decorative Concrete Council sealer guide explains how surface condition, appearance, exposure, and maintenance affect sealer selection.
Can Driveway Sealer Go Bad in the Container?
Yes. Age, poor storage, air entering a partly used container, or freezing can make a driveway sealer unfit to use. Water-based asphalt sealer is especially vulnerable to freezing. Latexite's storage guidance says its water-based sealer is ruined if it freezes.
Some settling can be normal, so check the product label before throwing the container away. Do not use the sealer when it is past the stated shelf life, has frozen against the label warning, contains hardened skin or contamination, or will not return to a smooth and even consistency after the required mixing.
Do not add water, solvent, or another product unless the manufacturer directs you to do so. When storage history or condition is uncertain, contact the maker with the product name and lot number or replace the container rather than testing questionable material across the whole driveway.
Apply Thin Coats in the Right Weather
- Confirm the pavement is clean and dry.
- Read the product limits for surface temperature, air temperature, humidity, rain, and dew.
- Measure the area and stay within the label's spread rate.
- Apply each coat evenly with the tool named on the label.
- Wait for the stated recoat, rain-safe, foot-traffic, and vehicle-traffic times.
Manufacturer instructions vary. For example, SealBest technical data and Latexite application guidance set product-specific preparation and weather limits. Use the label for the product in your container as the final rule.
Prevent the Next Coating Failure
- Fix drainage, sprinklers, or downspouts that keep the driveway damp.
- Remove oil and loose older coating before opening the new product.
- Confirm compatibility instead of choosing by color or price alone.
- Measure the area so the coat is not applied too heavily.
- Block people and vehicles until the label says the surface is ready.
Before you reseal, use the driveway sealer weather window calculator to check the full application and drying period. If the driveway itself is still being planned, read how to pour a concrete driveway in sections.
Ready for the Next Step?
Use the related guides and tools on Home Care DIY Hub to plan the job before you start.