How to Repair Small Holes in Drywall
Transform unsightly nail holes and dings into invisible repairs in just 2-4 hours. Save hundreds on contractor costs with professional results.
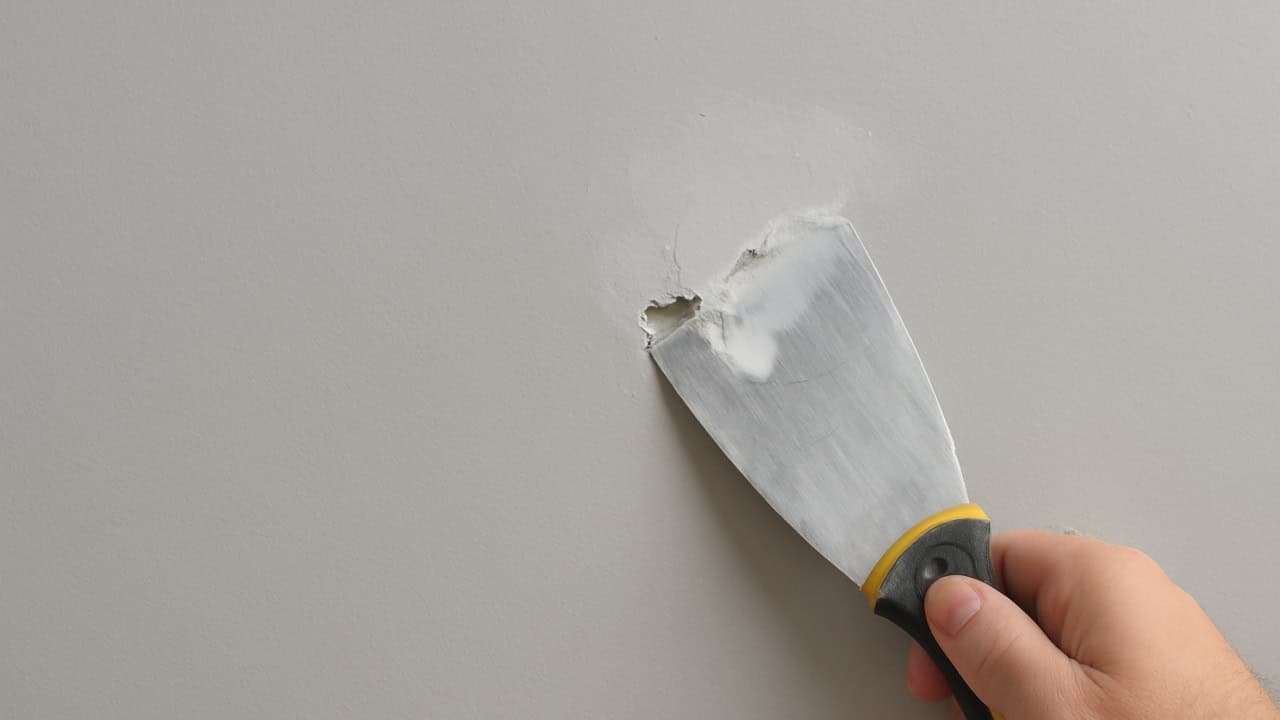
Small drywall holes are common but easily repairable with basic tools and materials
Small drywall holes cost homeowners $75-150 per repair when hiring professionals, yet the same fix requires just $10-15 in materials and 2-4 hours of work. From nail holes to small dings up to 6 inches, these common wall imperfections are easily repairable with basic tools.
Quick Answer: Fill small holes with joint compound, sand smooth when dry, prime the area, and paint to match. Most repairs take 2-4 hours including drying time.
This guide covers everything from tiny nail holes to palm-sized damage, with techniques that create invisible repairs indistinguishable from the original wall surface.
Tools and Materials You'll Need
Most repairs require under $15 in materials you likely already own. Essential supplies include:
Step-by-Step Guide to Repairing Small Holes in Drywall
Step 1: Size Assessment
Holes under 6 inches qualify as small repairs. Nail holes (under 0.5 inches) need only compound, while 1-3 inch holes require mesh patches for proper reinforcement.
Size Guide: Nail holes = compound only. Screw holes = patch recommended. 2+ inches = patch required for durability.
Step 2: Surface Preparation
Remove loose debris around the hole and clean with a dry cloth. Proper preparation ensures maximum adhesion and prevents future cracking.
Step 3: Patch Installation (1-6 inch holes)
Apply self-adhesive mesh patches centered over holes larger than 0.5 inches. Press firmly to eliminate air bubbles and ensure complete adhesion.
Step 4: Compound Application
Apply thin layers of joint compound, pressing firmly to fill completely. Feather edges 2-3 inches beyond the repair area for seamless blending.
Pro Technique: Multiple thin coats (2-3 applications) create smoother results than single thick applications that crack or shrink during drying.
Step 5: Drying Time
Allow 2-4 hours drying time per coat (varies by humidity and thickness). Compound should be completely dry before sanding to prevent damage.
Step 6: Sanding Process
Start with 120-grit sandpaper for shaping, finish with 220-grit for smoothness. Sand lightly in circular motions, checking frequently to avoid over-sanding surrounding areas.
Sanding Tip: Use a sanding block for flat surfaces and hand-sand detailed areas. Clean all dust before priming.
Step 7: Additional Coats
Apply second coats if needed, extending feathered edges further for seamless blending. Most small repairs require 2-3 thin applications total.
Step 8: Priming
Prime repaired areas to seal porous compound and ensure uniform paint absorption. Use high-quality primer for invisible repairs.
Step 9: Final Paint
Match existing paint sheen and apply 1-2 coats as needed. For best results, paint entire wall sections from corner to corner to avoid color variations.
Professional Finishing Techniques
Texture Matching: For textured walls, apply matching texture before painting. Use sponges, rollers, or spray bottles to replicate existing patterns.
- Feather edges 2-3 inches beyond repair for invisible blending
- Work in bright lighting to spot imperfections during application
- Paint entire wall sections corner-to-corner for uniform appearance
- Use quality materials - cheap compounds shrink and crack over time
Damage Prevention
Simple precautions prevent future repairs and maintain your walls' appearance:
Furniture Protection: Install bumpers on chair backs and table edges. Heavy Items: Use appropriate wall anchors instead of nails. High-Traffic Areas: Consider wall guards or decorative panels for protection.
Maintenance Tip: Include drywall inspection in your seasonal maintenance routine to catch small issues before they become larger problems.
Common Mistakes to Avoid
Quality joint compound selection and proper application technique prevent most repair failures and ensure long-lasting results.
Conclusion
Small drywall hole repairs save significant money while maintaining your home's appearance and value. These techniques work for any wall surface, including garage drywall applications where moisture protection is also needed.
Master these basic repair techniques and you'll handle 90% of common wall damage confidently. The key to invisible repairs lies in patience, proper preparation, and quality materials.
🎨 Repair Success Formula
Small Investment, Big Impact: $10-15 in materials and 2-4 hours of work can save $75-150 in professional repair costs. Focus on thin coats, proper drying time, and quality primer for invisible, lasting results that maintain your home's value.